导航
本文目标
- 了解 SpringBoot 自动配置的功能,理解其基本实现原理(Level1)
- 可以根据实际业务需求,去寻找合适的 Starter(Level1)
- 当现成的 Starter 不满足需求时,可以自己封装自定义 Starter(Level2)
- 理解自定义 Starter 源码背后的运行原理,即 @SpringBootApplication 到底做了哪些事情(Level3)
等级说明
- Level1: 对 Java 和 SpringBoot 感兴趣的同学
- Level2: 大量使用 Java 做开发的同学
- Level3: 想要深入研究 Spring 和 SpringBoot 的同学
0 引言: SpringBoot Starter 与自动配置
SpringBoot Starter 是 SpringBoot 的重大特性之一。它分组整合了一些常用的依赖,使得用户在 maven 或 gradle 中只要依赖一个 starter,就有了一大堆功能集合。
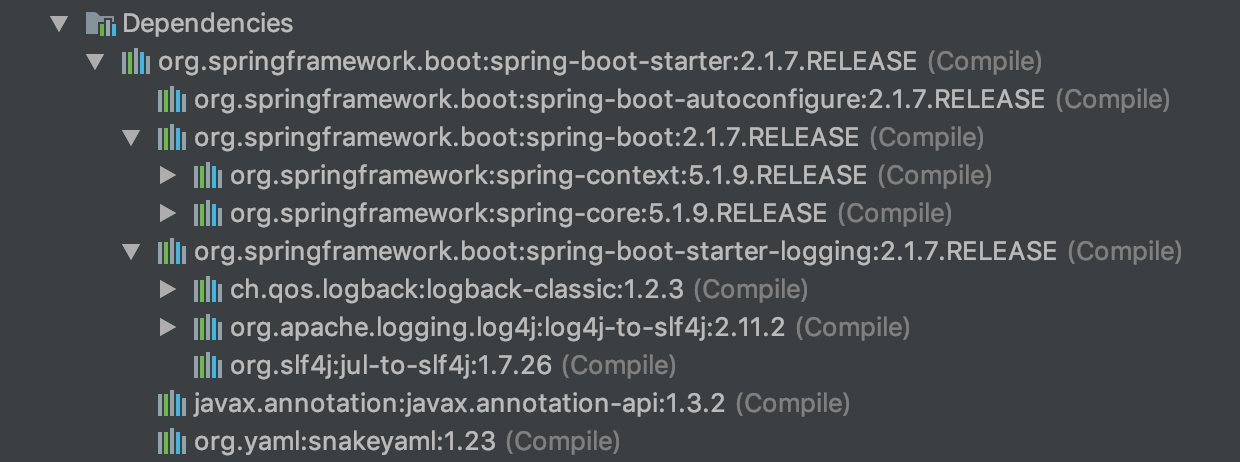
比如,你只要依赖了 spring-boot-starter,就有了如下功能:
- yaml 文件读取
- 日志功能
- Spring 核心功能
- 自动配置
(Spring Boot 针对不同的应用场景提供了各种 starter,具体有哪些后面会提到。)
本文主要关注自动配置功能。
下面将通过一个自定义 Starter(RandomStarter) 的 demo 来讲解:
- 什么是自动配置
- 如何编写一个具备自动配置功能的自定义 Starter
- Spring Boot 底层实现自动配置的原理
1 RandomStarter 介绍与演示
(以下例子中将使用 gradle 管理依赖)
1.1 应用场景描述
我们有一个名为 Random 的功能模块,目前功能只有一个:从 m 个字符串中,随机选择 n 个返回(m > n,且 m 和 n 可配置)。
核心代码如下:
public class RandomChoiceMachine {
    private List<String> list;
    private int num;

    public RandomChoiceMachine(List<String> list, int num) {
        this.list = new ArrayList<>(list);
        this.num = num;
        assert this.num <= this.list.size();
    }

    public List<String> next() {
        Collections.shuffle(list);
        return new ArrayList<>(list.subList(0, num));
    }
}
现在我们要在项目中复用 Random 模块里的这个工具类。
1.2 Spring 中的做法
1.2.1 引入 Spring 依赖
dependencies {
    compile("org.springframework:spring-context:5.1.9.RELEASE")
    compile project(':random')
}
1.2.2 设置参数
// application.properties
demo.random.choice.items=a,b,c,d,e,f,g
demo.random.choice.num=2
1.2.3 写配置类
读取配置文件,并生成 Bean。
@Configuration
@PropertySource("classpath:application.properties")
@ComponentScan
public class AppConfig {
    @Value("${demo.random.choice.items}")
    private String itemsStr;
    @Value("${demo.random.choice.num}")
    private int num;

    @Bean
    public RandomChoiceMachine randomChoiceMachine() {
        return new RandomChoiceMachine(Arrays.asList(itemsStr.split(",")), num);
    }
}
1.2.4 运行测试
@Component
public class TestDriverSpringApplication {
    @Autowired
    private RandomChoiceMachine randomChoiceMachine;

    public void run() {
        for (int i = 0; i < 3; i++) {
            printList(randomChoiceMachine.next());
        }
    }

    private void printList(List<String> list) {
        System.out.println(String.join(",", list));
    }

    public static void main(String[] args) throws Exception {
        AnnotationConfigApplicationContext context = new AnnotationConfigApplicationContext(AppConfig.class);
        TestDriverSpringApplication testDriver = context.getBean(TestDriverSpringApplication.class);
        testDriver.run();
    }
}
1.3 SpringBoot 中的做法(使用 RandomStarter)
1.3.1 引入 SpringBoot 和自定义 Starter 依赖
dependencies {
    implementation('org.springframework.boot:spring-boot-starter')
    compile project(':spring-boot-starter-random')
}
1.3.2 设置参数
// application.properties
demo.random.choice.items=a,b,c,d,e,f,g
demo.random.choice.num=2
1.3.3 运行测试
@SpringBootApplication
public class TestDriverSpringBootApplication implements CommandLineRunner {
    @Autowired
    private RandomChoiceMachine randomChoiceMachine;

    public static void main(String[] args) {
        SpringApplication.run(TestDriverSpringBootApplication.class);
    }

    @Override
    public void run(String... args) throws Exception {
        for (int i = 0; i < 3; i++) {
            printList(randomChoiceMachine.next());
        }
    }

    private void printList(List<String> list) {
        System.out.println(String.join(",", list));
    }
}
1.4 对比总结
可以看到,我们在 SpringBoot 中,依赖了 spring-boot-starter-random 后,会自动读取 application.properties 文件,给我们一个配置好的 RandomChoiceMachine 实例。这就是“自动配置”的威力。
它是怎么实现的呢?我们可以写一遍 RandomStarter,来看看它里面到底有什么黑魔法。
2 构建项目
2.1 添加依赖
建立空项目,引入依赖:
dependencies {
    implementation('org.springframework.boot:spring-boot-autoconfigure')
    compile project(':random')
}
2.2 配置映射参数实体
@ConfigurationProperties(prefix="demo.random.choice")
public class RandomChoiceProperties {

    private List<String> items = new ArrayList<>();
    private int num = 1;

    public List<String> getItems() {
        return items;
    }

    public void setItems(String items) {
        this.items = Arrays.asList(items.split(","));
    }

    public int getNum() {
        return num;
    }

    public void setNum(String num) {
        this.num = Integer.parseInt(num);
    }
}
2.3 编写业务
业务已在 random 模块中写好。
2.4 实现自动化配置
@Configuration // 开启配置
@EnableConfigurationProperties(RandomChoiceProperties.class) // 开启使用映射实体对象
@ConditionalOnClass(RandomChoiceMachine.class) // 存在HelloService时初始化该配置类
@ConditionalOnProperty // 存在对应配置信息时初始化该配置类
        (
                prefix = "demo.random.choice", // 存在配置前缀
                value = "enabled", // 开启
                matchIfMissing = true // 缺失检查
        )
public class RandomAutoConfiguration {

    /**
     * application.properties 配置文件映射前缀实体对象
     */
    @Autowired
    private RandomChoiceProperties randomChoiceProperties;

    /**
     * 根据条件判断不存在 RandomChoiceMachine 时初始化新 bean 到 Spring 容器
     */
    @Bean
    @ConditionalOnMissingBean(RandomChoiceMachine.class)
    public RandomChoiceMachine randomChoiceMachine() {
        return new RandomChoiceMachine(randomChoiceProperties.getItems(), randomChoiceProperties.getNum());
    }
}
2.5 创建 spring.facotries
我们在 src/main/resource 目录下创建 META-INF 目录,并在目录内添加文件 spring.factories,具体内容如下:
# 配置自定义Starter的自动化配置
org.springframework.boot.autoconfigure.EnableAutoConfiguration=com.plough.random.RandomAutoConfiguration
到此就完成了整个 RandomStarter 的编写。
3 Starter 源码解释——SpringBoot 实现自动配置的底层原理
虽然已经讲完了 RandomStarter 是怎么写的,但还是有点抽象。RandomStarter 的源码是比较简单的,为啥这样写就能实现自动配置呢?
大致原理如下:
- @SpringBootApplication 注解的内部,有一个 @EnableAutoConfiguration,有了它,SpringBoot 就会去读取 spring.facotries 文件;
- spring.facotries 文件指定了配置类的位置,这样 SpringBoot 就加载到了 RandomAutoConfiguration 这个配置类;
- RandomAutoConfiguration 会根据设定的参数,去生成 RandomChoiceMachine 的 Bean。
忽略了较多细节,感兴趣的同学可以自行深入研究。
4 SpringBoot 提供的各类 Starter
可以到官方文档中去看。我们了解常用的 Starter 后,可以在项目中直接应用。
5 其他
5.1 项目源码
GitHub:https://github.com/plough/random-starter-demo
5.2 踩坑记录
- 一开始,配置前缀用的是 random.choice,运行时会出错,无法正常读取。一通 debug 后,发现与 java.util.Random 的命名有冲突(具体有啥联系没有深究),于是把前缀改为 demo.random.choice,就正常了。
5.3 参考文章